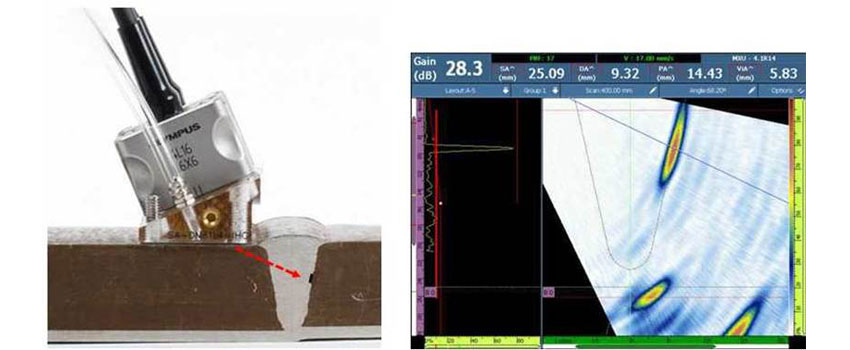
Phased Array Ultrasonic Testing (PAUT)

SWTUV PAUT experts have been involved in various research and development programs and have been pioneers in some of the techniques. The research and development program focused on PAUT as an emerging technique for the advanced inspection of critical discontinuities in the power industry. SWTUV personnel have conducted literature reviews and published local conference papers of PAUT on compliance to Standards and the use of qualification blocks to increase probability of detection. Research investigations have been conducted on the effects of PAUT signal responses to temperature, surface conditions and couplants beyond those prescribed in Standards. Specially designed calibration blocks were also fabricated for PAUT testing on different materials such as aluminium, stainless steel, low carbon steel and Inconel. Undertaking the research and development program has produced sound fundamentals for understanding the theory and practical aspects behind PAUT.
PAUT fits into the NDT inspection repertoire and is complimentary just like any other technique. The technique has many potential applications, but can be inhibited by limitations such as geometry, time and access. In general, a scan plan is required as an initial step to ensure suitable beam coverage is achieved. SWTUV team of PAUT operators are capable of developing PAUT scan plans and can offer technical justification summaries to account for test parameters. Furthermore, they have vast experience in developing PAUT procedures and work instructions for the traceability and repeatability of inspections
Depending on client needs, SWTUV has capabilities to deliver the following expertise:
- Perform encoded scans on complex geometries
- Individually tailor development of qualification blocks, configuring rigs for data collection and levels of post-analysis reporting
- 100% weld volume coverage at scanning intervals of 1mm, of high pressure and high-temperature piping welds at power station sites using encoded scanning on circumferential and seam welds between 20mm to 75mm wall thickness
- Inspection of small bore tubes – internal diameter of 50mm down to 6mm.
- Inspection of complex geometry branch welds with variable weld profile using encoded scanning for accurate sizing of internal defects
- Turbine and generator components inspections with special focus on areas of high stress concentration such as fur tree serrations of turbine blade roots and geometry changes along exciter cooling fans
- Detection of corrosion wastage in wind tower foundation bolts with reliable monitoring of corrosion wastage along the length of bolts up to 5 times its diameter.
- Corrosion inspection of storage tanks
- In-situ inspection of transverse cracks along shafts and axles for the public transport sector.
- Provide accurate analysis and reporting on the presence of any cracks to enable the client to make an informed decision for repair or continued operation
- Country wide inspection of pipeline welding, high pressure vessels, bifurcation lines and valve bodies and provision of detailed analysis reports.
- Inspection of various flat and shaped Aerospace CFRP (Composite Fibre Re-enforced Polymers) for delaminations and other discontinuities